OneShot Modding Guide [WIP]Version 2 by TehAwesomestKitteh (Last Updated: Jan 3, 2025)Suggestions, questions, etc. not covered in this guide? Come ask in the Kitteh Space Station Discord Server Hullo! This is the improved version of my old OneShot Modding Guide. If you wish to see the no-longer maintained, old version. You can click here. This guide will cover things from stuff that you need, how to make your own NPCs, and other things that are present in OneShot. Like all things however, this is merely a guide, and so you're encouraged to experiment on new things. Or if you're only here to find out how to make another "OneShot 2: Electric Penguin Boogaloo", then that's fine as well since most of the basic things will be covered anyways. Table of Contents [HIDE]Repaints - Completely Basic Modding Introduction/Requirements for Modding Setting Up the Mod Workspace MODDING Items Basic Items Usable Items Using Items with the world Combining Items Fast Travel Unlocking and Prevention Text and Dialogue Format and Formatting Codes Saving Persistent Data Advanced Modding Repaints - Completely Basic ModdingThis part covers the most basic form of modding. It requires no tools at all except images. This form of modding is called "Repainting". Which is exchanging an existing image in the game with a new one of the modder's choice. Doing this is super simple. Just go to OneShot's directory*, Graphics, then go to the appropriate folder that has the image and replace it with your new one. Now when you play OneShot again, wherever that image will be used, it will use your new image. An important note: When replacing the image it should be the same name (For example: If you replace "niko" you should also replace the image with a "niko"), and same file extension (.png, .wav, etc.) Although it's called "repainting", this also applies to audio. Same thing you have to do: replace the file with the same name and file extension. * On Windows this is Steam/steamapps/common/OneShot Introduction/Requirements for ModdingNow if you're not repainting, but planning to actually mod the game. Then the rest of the guide is for you. As a note to those reading, this guide is focused on how to mod OneShot (therefore tutorials on how to code, how to draw, etc. will not be covered except for the walkthroughs to mod the specific game mechanic) and is aimed towards people who are new to modding OneShot. First and foremost you'll need the proper tools. The following are what you'll need:
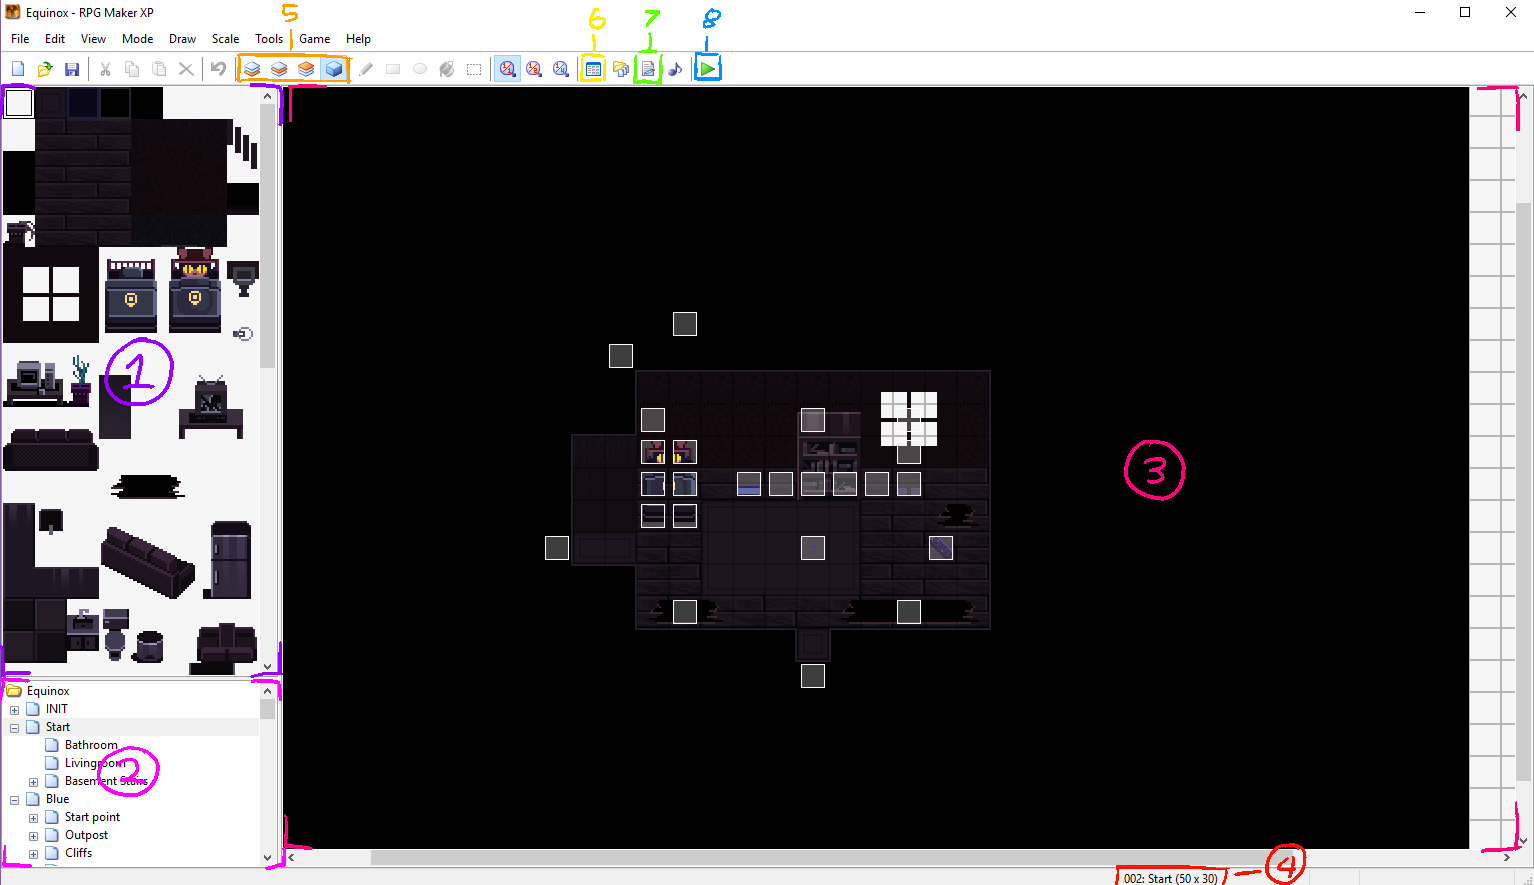
Other tools for making art, music, etc. are up to the modder. Setting Up the Mod WorkspaceThe mod workspace is essentially a copy of OneShot that you can edit. This is also to prevent breaking your original OneShot in case you mess with something you shouldn't have. To set it up, simply follow these instructions on the mod template. Read it carefully and follow the instructions. Everything should set itself up. What follows now is the modding proper. MODDINGTo start, run Game.rxproj. It should look something like this:
The highlighted are:
As a side note, the mod uses the same save file as your OneShot save. So make sure to always have backups of everything. ItemsOneShot's Item system consists of four things:
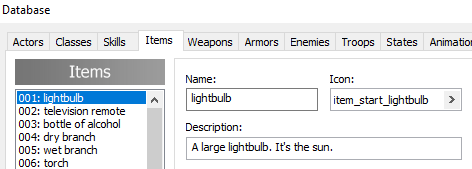
All items are gained and lost by using RPG XP's "Change Items..." Event commands All items are also created or defined in the Items Database, but their functionality depends on the use of the three things. Each of which are explained below. Basic ItemsThese items are items that are usually combined with another, or interacted with something in the world. Examples are the sun, the bottle of alcohol, and the amber from Silver. To make one, pick an empty slot in the Items Database, give it a Name, Icon (icons are found in the folder "Graphics/Icons"), and Description, and you're done. For reference, this is the sun's definition:
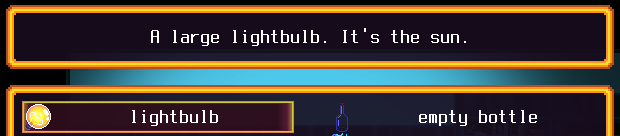
And how it appears in-game:
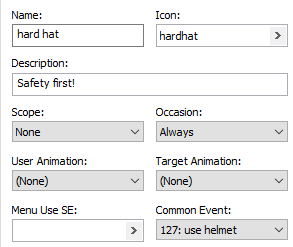
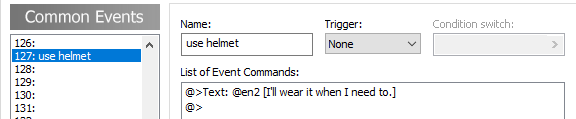
Usable ItemsThese items are items that can be used directly. Examples are the weird film and the gas mask. They're different in that in-game they pop up with a green name. To make one, do the same steps you would do with a Basic Item, but also set the "Common Event" field to a common event you would like to run. If one doesn't exist, define a new one. For reference, here is the definition for a mod item. The hard hat:
Note that it has a name, description, and icon. But also it has a Common Event defined,
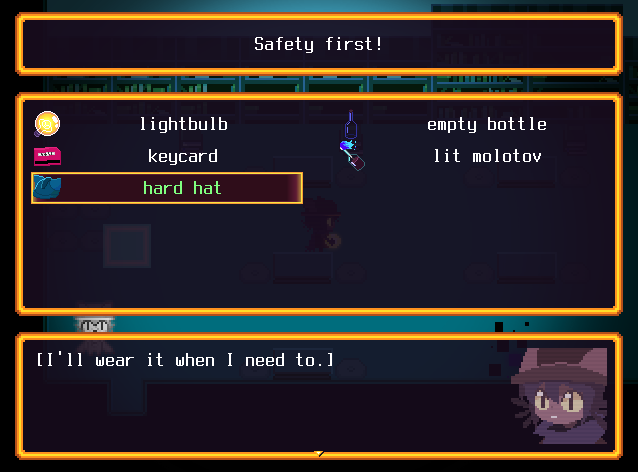
Now whenever it's used in-game, the item will have green text, and it will run whatever was in its defined common event. Like so:
Using Items with the worldWhenever you select an item in the inventory, it highlights it and the icon appears in the lower-right. But what this also does is set the variable To define behavior for an interaction:
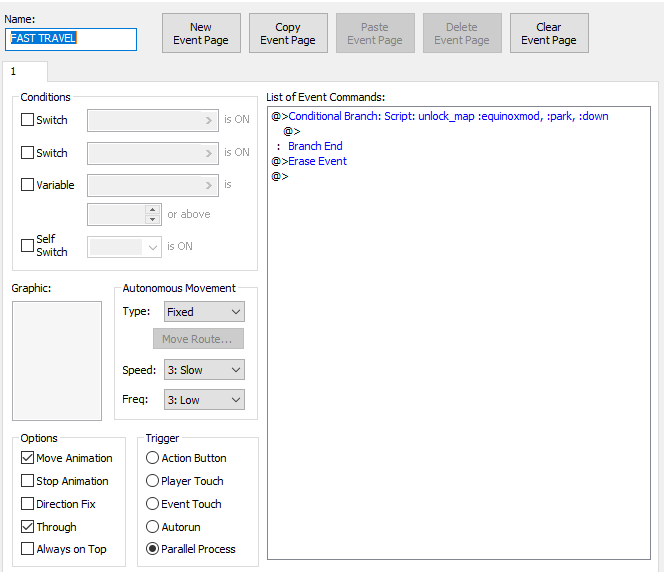
Whenever the item's ID matches that of what's checked, it will run whatever is inside the conditional branch. As an extra note, changing Combining ItemsWhen you combine two items, To add your own recipe, first take note of the IDs of the items you want combined. Next, open In case it's confusing, the format is " "a" and "b" can be any item, but "c" has to be unique (unless you want to associate the combination with an existing result) Fast TravelUnlocking and PreventionTo create a Fast Travel location, first define a new "Zone" in the Once you've done that, make an event at the fast travel point you want the player to end up on.
Here I've set my zone to be "
Now to prevent fast travel, create an Event with "Parallel Process" enabled, and put in a
If done correctly, fast travel will be disabled in the room that event is in. Text and DialogueFormat and Formatting Codes[TBA] SavingPersistent Data[TBA] Advanced Modding[TBA; This section will include utilizing OneShot's "piping" system in order to interact with external custom programs (such as the Journal).] [TBA; As well as utilizing RPG Maker's Ruby scripting for custom functionality.]
|